1:12 Dollhouse Plans: 4 Steps to Create Your Miniature Doll House
Are you dreaming of creating the perfect dollhouse for your little one? Look no further than our 1:12 dollhouse plans! These detailed blueprints and step-by-step instructions will help you bring your vision to life and create a miniature masterpiece that will delight and inspire for generations to come.
Whether you’re a seasoned DIY enthusiast or a beginner, our plans provide the perfect roadmap to crafting a one-of-a-kind dollhouse that will be treasured for years to come. Get ready to unleash your imagination and build something truly special!
Key Takeaways
- A 1:12 scale dollhouse requires a 1-inch-to-1-foot ratio for realistic miniature spaces and harmonious design.
- Sketch the layout, decide on room numbers and functions, and choose an architectural style for the dollhouse.
- Build the foundation and structure using wood, glue, and tools, ensuring accurate measurements.
- Add interior details like staircases, doors, windows, and flooring to create a realistic and functional space.
- Explore miniature furniture and accessories to complete the interior and exterior decoration.
Understanding the 1:12 Scale Doll House
Understanding the 1:12 scale is crucial when building a dollhouse. It represents the most common proportion in miniature design, where one inch in the dollhouse equals one foot in real life.
This scale allows you to create a realistically proportioned miniature space, complete with detailed furniture and accessories. A wide range of 1:12 scale furniture and accessories is available, making it easy to decorate and accessorize your dollhouse.
By working with the 1:12 scale, you can create a beautiful and functional miniature space that’s perfect for play or display.
Step 1: Making Your 1:12 Dollhouse Plans
Now it’s your turn to bring your 1:12 dollhouse to life by designing its layout and features.
Sketching the layout
Your design process begins by sketching the layout. It’s a crucial step in planning the overall structure and aesthetic of your 1:12 dollhouse. This involves considering the scale and dimensions of each room to ensure that the furniture fits appropriately. Include features like windows, doors, staircases, and room divisions in your layout sketch.
Use graph paper or online tools to create accurate and detailed sketches. Sketching helps visualize the overall look and functionality of the dollhouse before construction. Incorporating these elements into your building plans is essential to ensure a cohesive final product.
Deciding on the number of rooms and their functions
As you plan your miniature world, you must decide how many rooms to include and their purposes based on the scale of your dollhouse.
Think about the whole theme or style you want for your dollhouse to guide room design. Plan the layout of the rooms based on the needs and preferences of your miniature inhabitants.
Your building plans should reflect a thoughtful room design that balances functionality with aesthetics.
Considering architectural style
Once you’ve established your room layout and functions, you’ll want to consider the architectural style of your dollhouse, as it will greatly influence the aesthetic and design decisions.
You can choose from various styles, such as Victorian, modern, or traditional, each with its unique characteristics. Research different styles to find inspiration and ideas for your dollhouse design.
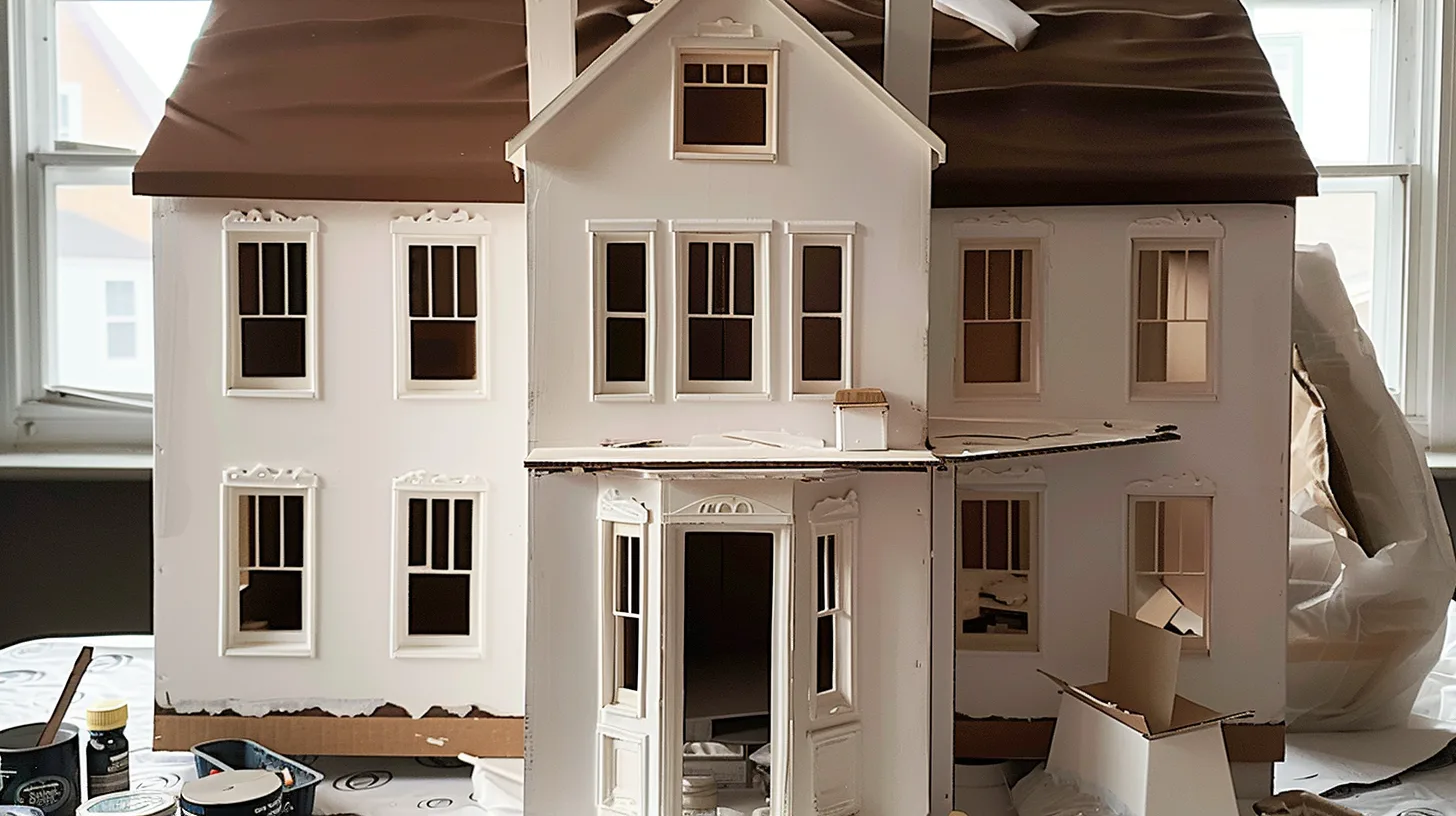
Step 2: Building the Foundation and Structure
With a clear plan in mind, you can now prepare the necessary materials and tools to build the foundation and structure of your dollhouse.
Cutting and assembling the base and walls
Begin by cutting and assembling the base and walls from a sheet of 3/4 plywood. Following your dollhouse plans, you’ll ensure accurate measurements and a sturdy foundation.
Use pocket holes and wood glue to assemble the base and walls for a secure fit. As you build, consider adding trim to create a crown molding effect, giving your dollhouse a polished look.
Additionally, paneling on the roof and sides can add character and charm to your miniature home. By carefully cutting and assembling the base and walls, you’ll establish a strong foundation for your dollhouse, bringing your building plans to life.
Installing floors and ceilings
After constructing the base and walls, you can add the floors and ceilings, providing a solid foundation for the rest of your 1:12 dollhouse.
Try using jumbo popsicle sticks trimmed to varying lengths for a realistic hardwood flooring effect. Secure them with superglue for durability and longevity in your wooden dollhouse structure. Stain the floors with your desired color and finish to match the overall aesthetic of your dollhouse.
For ceilings, opt for lightweight materials like thin plywood or foam board to maintain the structural integrity of your dollhouse construction. Ensure proper installation of floors and ceilings to provide a solid foundation for the rest of your dollhouse construction and design.
Step 3: Adding Interior Details
Now that you’ve built the foundation and structure of your 1:12 dollhouse, it’s time to focus on adding interior details.
Constructing staircases and doors
Constructing staircases and doors is a crucial step for your dollhouse. Create stairs with thin wooden strips or molding, ensuring a proportional rise and run for a realistic appearance.
For doors, use balsa wood or thin plywood, cut to size and hinged for function. Add miniature hardware like hinges and doorknobs for authenticity. Don’t forget to customize your staircase with handrails made from thin wire or miniature railing kits for safety and aesthetic appeal.
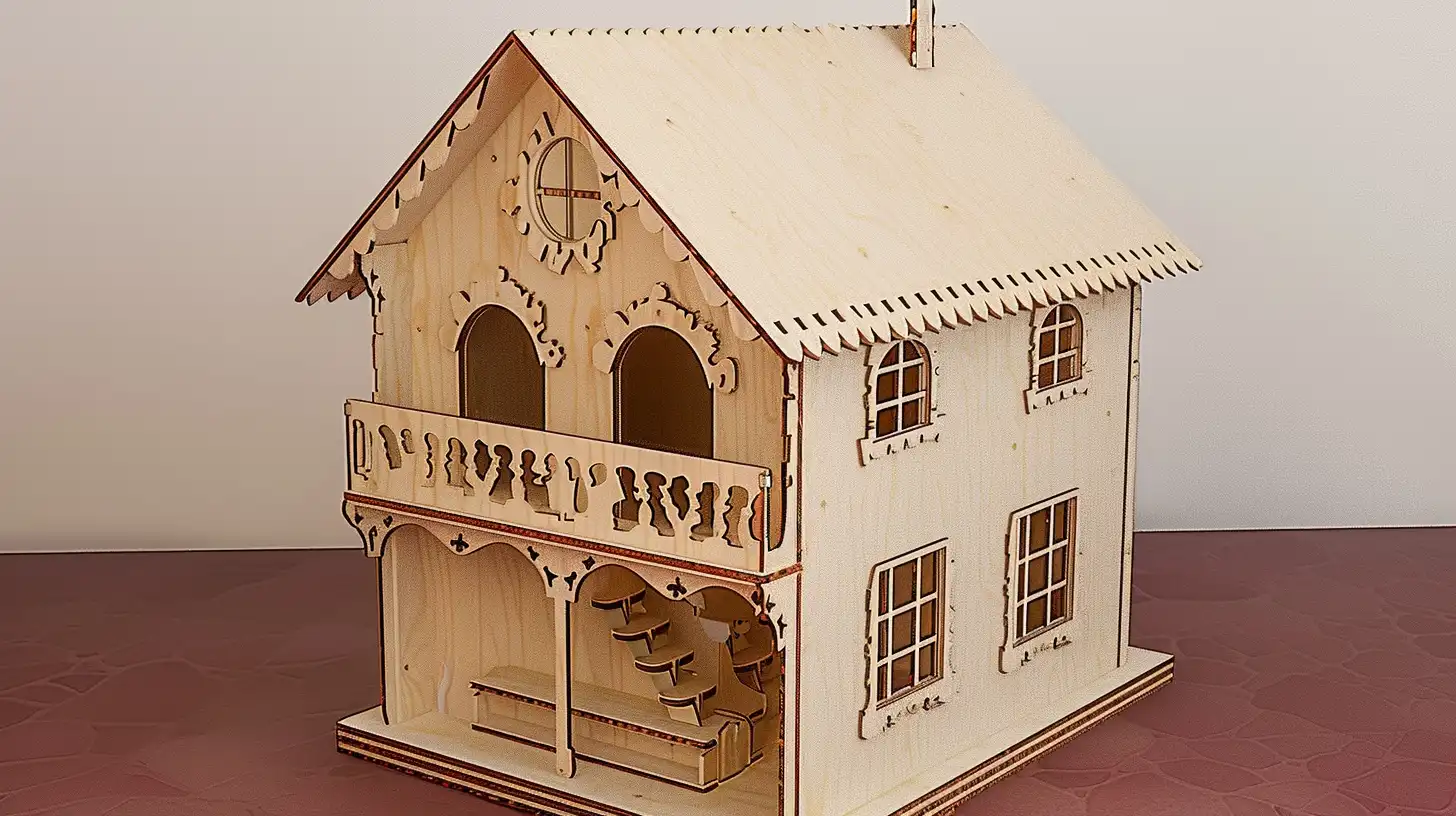
Making windows and window frames
Crafting realistic windows for your dollhouse involves using thin, clear plastic sheets for the windows and thin strips of wood for the frames. For authenticity, add window panes with mullions and paint or stain the frames to match your dollhouse design.
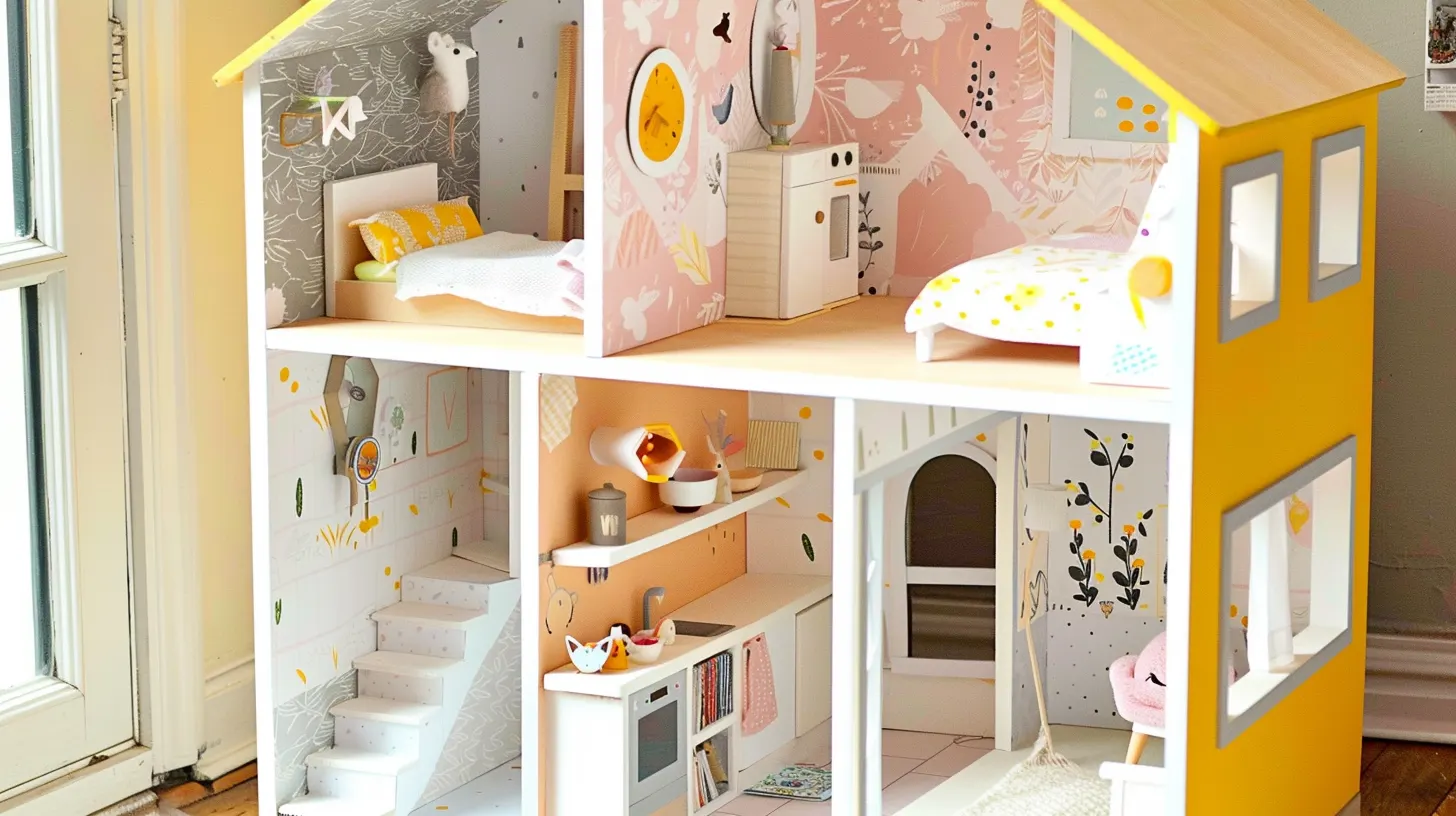
Creating detailed interiors
Now that the dollhouse’s exterior is taking shape, focus on creating a warm and inviting interior. Choose wallpaper, flooring, and trims to reflect your unique style.
Explore a variety of wallpaper designs and consider parquet kits or wood sheets for flooring. Add trims in different wood types to complete the interior. Experiment with patterns, textures, and materials to bring your dollhouse to life.
Step 4: Adding Furniture and Accessories
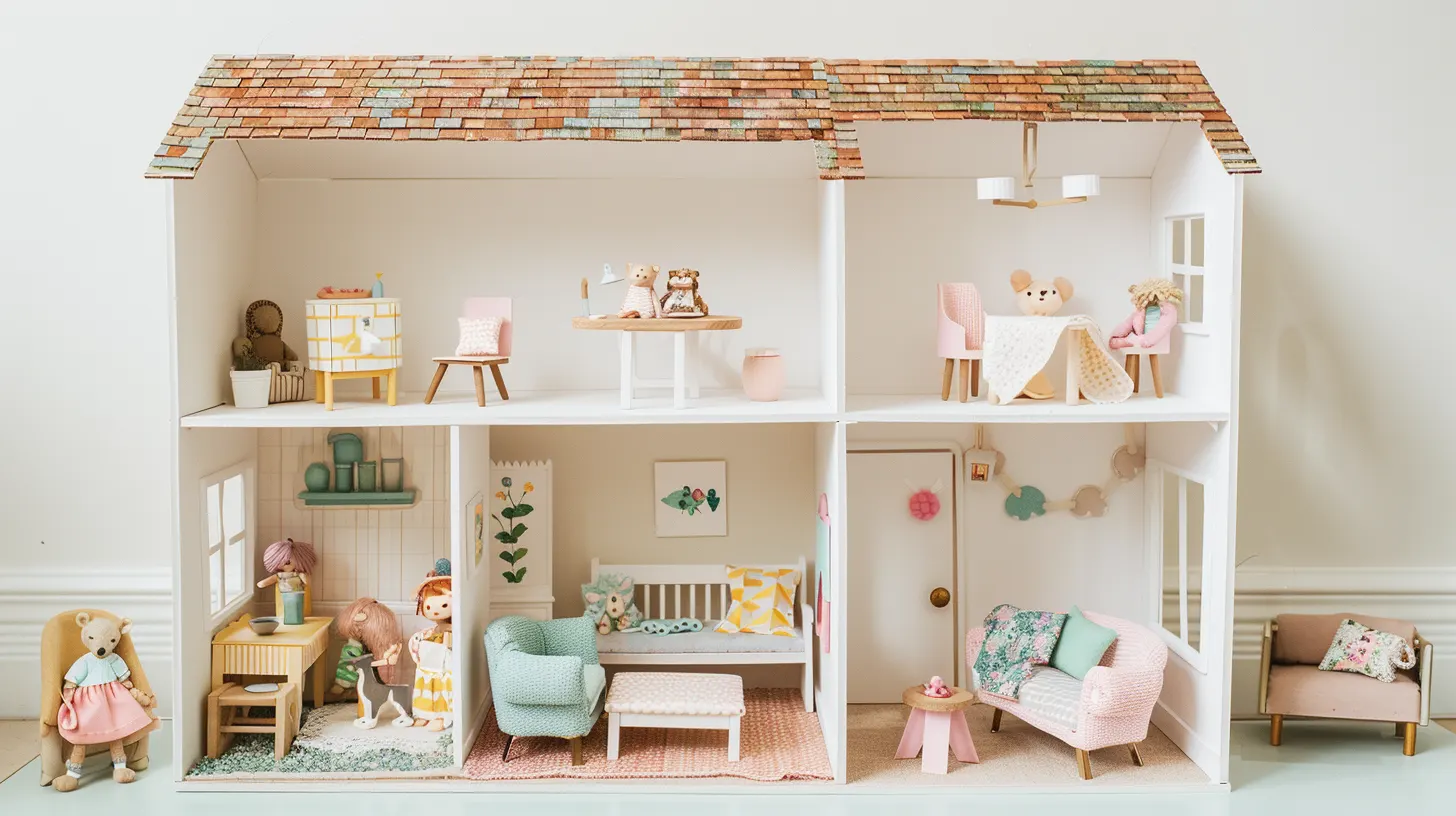
As you explore the world of dollhouse furniture, you’ll discover a wide range of options to create a unique and personalized space. Add a touch of elegance with Victorian wallpaper or modern pergola kits.
For intricate details, consider laser-cut furniture with 3mm thickness or dollhouse decorative railings on a 1:12 scale. With dollhouse materials like Baltic birch sheets, eyelets, and miniature nightstands, you’ll have everything you need to bring your dollhouse to life.
Whether you’re a seasoned crafter or a beginner, you’ll find the perfect miniature accessories to make your dollhouse a true masterpiece.
Step 5: Final Touches and Decoration
Now that you’ve furnished your miniature masterpiece, it’s time to add the final flourishes that’ll make it truly special.
Painting the exterior of the dollhouse
A beautifully painted exterior is essential to creating a realistic and visually appealing miniature home.
Use drywall compound and off-white paint on the exterior to achieve a realistic look. Experiment with different painting techniques to create desired effects. Consider using spray paint cans with triggers for smooth and even coverage.
Don’t forget to pay attention to detail by adding trim pieces for baseboards, crown molding, and window frames for a polished finish.
Landscaping around the dollhouse
To create a charming miniature setting, surround your dollhouse with a beautifully landscaped exterior that mirrors real-life outdoor spaces.
Add miniature plants, trees, flowers, and shrubs to create a more lifelike environment. You can also use materials like moss, gravel, sand, and small rocks to create pathways, gardens, and outdoor spaces.
Remember to incorporate outdoor furniture, birdhouses, fences, and other accessories to further complete the landscaping.
Adding lighting for realism
Incorporating lighting can create an immersive and realistic miniature world. With your dollhouse plans in hand, you can strategically place LED lights to highlight specific areas and create a warm, inviting atmosphere.
When it comes to wiring, you can discreetly hide it within the walls or use channels to keep it out of sight. If you prefer a more straightforward approach, battery-operated lights are a convenient option.
By incorporating lighting into your dollhouse plans, you’ll create a truly immersive experience that brings the miniature world to life.
Conclusion
You’ve made your 1:12 dollhouse, and it’s a miniature masterpiece! With careful planning and attention to detail, you’ve crafted a unique and inviting space.
From the foundation to the final decorations, every element works together in harmony. Now, take a step back and admire your handiwork.
Your dollhouse is a testament to your creativity and dedication. It’s a tiny treasure that will delight for years to come.
FAQs
What Is the Best Material to Build a Dollhouse?
When deciding on a material, consider durability, ease of use, and budget. For a sturdy and visually appealing dollhouse, you might opt for plywood, MDF, or balsa wood, or even cardboard for a temporary, budget-friendly option.
What Are Standard Dollhouse Sizes?
Typically, the sizes range from 1:12 scale (1 inch equals 1 foot) to 1:6 scale (1 inch equals 6 feet). 1:12 is the most common and versatile option.
What Type of Wood Is Used to Make a Dollhouse?
Use plywood, specifically Baltic birch, for its smooth surface and strength or MDF for a paintable finish. Consider hardwoods like maple or walnut for intricate details and furniture pieces.