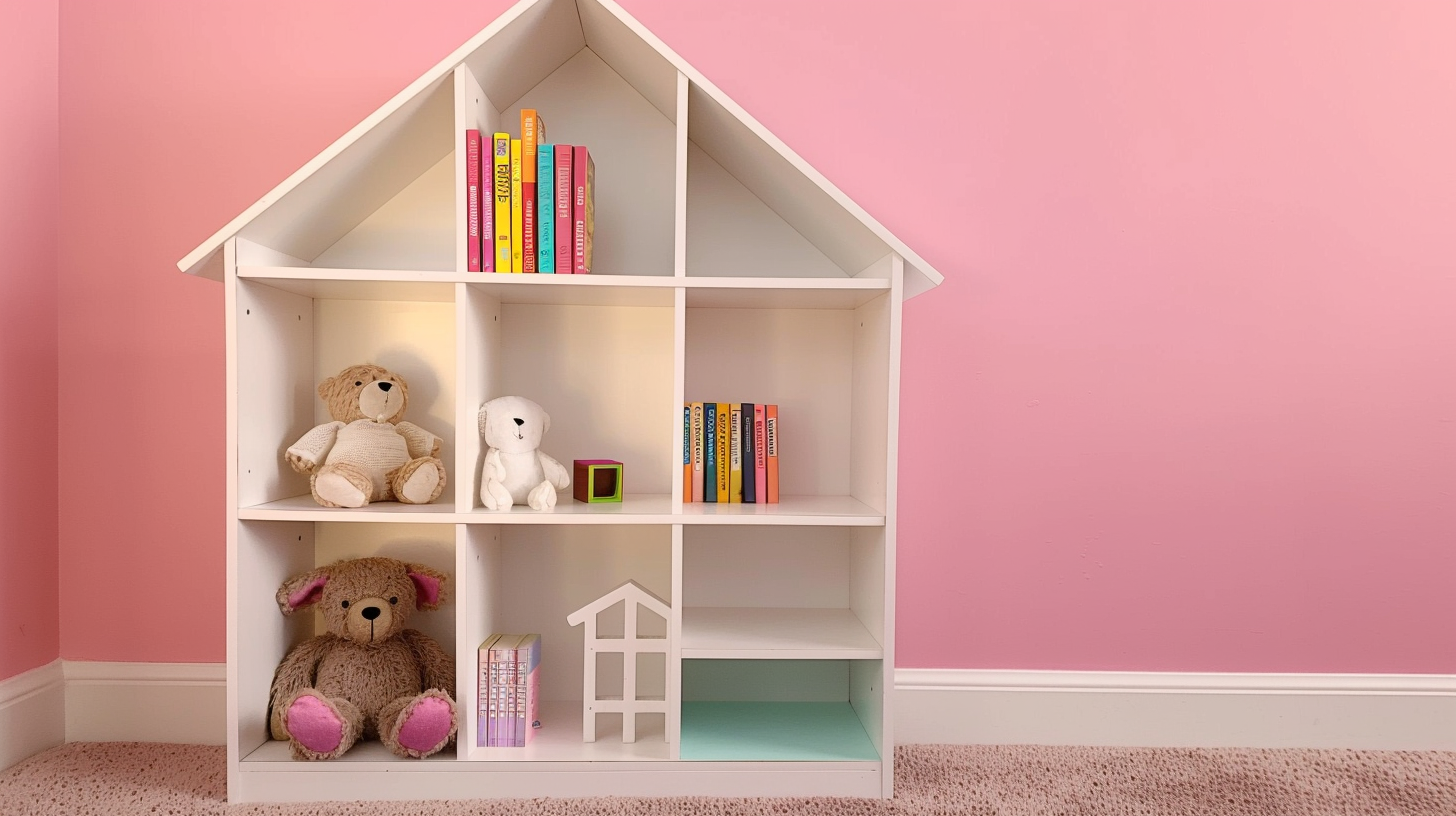
Dollhouse Bookshelf Plans: Building a DIY Dollhouse Bookcase
When embarking on your dollhouse bookshelf project, the right materials and tools are crucial for both durability and aesthetics. You’ll need high-quality boards for the frame, sturdy plywood for the shelves, and a miter saw to achieve precise cuts. Wood glue will play a pivotal role in ensuring your pieces bond securely, giving the bookshelf a professional finish. But before you start applying sealant to protect your creation, there’s a critical step you can’t afford to miss. Curious what it is? Now I will teach you how to build a bookshelf for your doll house.
Key Takeaways
- Use high-quality boards for the frame and sturdy plywood for shelves.
- Precise cuts with a miter saw ensure clean finishes and detailed designs.
- Apply wood glue thinly and evenly, combining with nails or screws for stability.
- Sand, prime, and apply multiple thin paint layers for a professional finish.
- Seal with polyurethane or varnish to protect wood from moisture and wear.
Materials and Tools You’ll Need to Build a Dollhouse Bookcase
To build your dollhouse bookcase, start by gathering essential materials.
- Boards and Plywood: You’ll need high-quality boards for the structure and sturdy plywood for the shelves to ensure durability and stability. Select boards that are straight and free of knots for the frame. Plywood, typically 3/4 inch thick, is ideal for shelves due to its strength and smooth surface.
- Wood Glue: Wood glue plays a crucial role in securely bonding the wooden components of your dollhouse bookcase. When you attach shelves, dividers, and trim pieces, wood glue ensures a strong, lasting hold.
- Paint: Choosing the right paint, such as acrylic or latex, ensures a durable and attractive finish for your dollhouse bookcase. Use high-quality paintbrushes to apply the paint evenly, ensuring smooth, consistent coats.
- Sealant: You’ll need to apply a high-quality sealant as the final protective layer. A sealant acts as a protective coating, safeguarding wood surfaces from moisture damage and wear. It enhances the wood’s appearance and prolongs its lifespan. Options for sealants include polyurethane, varnish, lacquer, and shellac, each available in finishes like matte, satin, semi-gloss, and gloss. When applying sealant, follow the manufacturer’s instructions meticulously for the best results.
- Miter Saw: You’ll need a miter saw to achieve the precise angled cuts that define the intricate design of furniture. This tool is crucial for cutting precise miter angles on side pieces and cutting roof boards with 45-degree angles for correct assembly.
- Brad Nailer: You’ll find a brad nailer indispensable for precisely securing trim pieces and railings when building a dollhouse bookcase. This tool offers unmatched precision, making it ideal for woodworking projects where accuracy is paramount. By using a nail gun, you can attach delicate trim pieces without the risk of splitting the wood.
- Jigsaw: A jigsaw is essential for cutting intricate shapes and curves in your dollhouse bookcase project. This versatile tool features a narrow, reciprocating blade that efficiently slices through wood. Opt for a jigsaw with adjustable speed settings to accommodate different types of cuts. Corded models offer steady power, while cordless versions provide mobility.
How to Build a DIY Dollhouse Bookshelf

To start building your DIY dollhouse bookshelf, cut all pieces according to the cut list and sand the edges for a smooth finish. Next, drill pocket holes in the shelving pieces and paint them. Proceed by assembling the middle and top shelving pieces, securing the divider, and installing the roof.
Step 1: Cut all pieces according to cut list and sand edges of each piece.
Start by meticulously measuring and cutting all pieces according to the cut list. Ensure each cut is precise to guarantee a seamless assembly. Use a sharp saw for precision cutting, maintaining accuracy to ensure a seamless fit when assembling your dollhouse bookshelf.
Once all pieces are cut, sand the edges thoroughly to remove any roughness and splinters, achieving a smooth finish. This not only enhances the entire look but also ensures safety and ease during assembly.
Step 2: Drill pocket holes in each shelving piece and paint these pieces.
Drill pocket holes in each shelving piece to ensure a secure and hidden attachment for your dollhouse bookshelf. Use a pocket hole jig and a power drill to make the pocket holes at the recommended angles. Position the holes strategically on the underside or back of each shelf to keep them hidden once assembled.
Using pocket hole screws, you’ll achieve a clean and professional finish. It can ensure that each shelf is securely fastened without visible screws, preserving the aesthetic appeal of your dollhouse bookshelf.
Then, make sure to paint each shelf piece thoroughly. This step ensures complete coverage and eliminates the need for touch-ups in hard-to-reach areas later. Allow the paint to dry fully before proceeding.
Step 3: Assemble the middle and top shelving pieces.
You can now attach the middle shelf to the side panels using wood glue and pocket hole screws. Place the middle shelf at the pre-determined height according to your bookcase plan. Ensure the shelf is level by using a carpenter’s level before securing it. Apply wood glue along the edges and fasten the shelf with pocket hole screws for a sturdy build.
Next, install the top shelving piece in the same manner. Center it properly and verify its alignment with a level. Check that both the middle and top shelves are securely attached. This step is crucial for ensuring the stability and functionality of your DIY dollhouse bookshelf.
Step 4: Secure a divider piece on the shelf.
Secure the divider piece to the shelf with 1.25-inch brad nails and wood glue to ensure stability.
First, apply a thin, even layer of wood glue along the edges of the divider. Position the divider on the shelf, ensuring it is perpendicular by checking with the speed square. Hold the divider in place and drive the 1.25-inch brad nails through the shelf into the divider at regular intervals.
This combination of wood glue and brad nails will provide a solid, stable connection. Ensure no gaps are left, and the divider is flush with the shelf surface. This step helps organize the bookshelf and adds structural integrity to your DIY dollhouse bookshelf.
Step 5: Install roof.
To install the roof, start by cutting the roof boards to size with precise 45-degree angles for proper alignment. Apply wood glue along the edges to secure the pieces together. Use nails and screws to reinforce the joints, ensuring the roof is stable and durable. Consider spray-painting the roof separately for a cleaner finish.
Next, attach the roof assembly to the top of the bookshelf. Apply wood glue along the joining edges, then use wood screws to firmly secure the roof in place.
Step 6: Attach plywood backing and secure trim pieces.
Secure the plywood backing to the bookshelf by aligning it with the frame. Then fasten it with nails or screws for enhanced stability. Ensure the plywood is cut to the exact dimensions of the bookshelf’s rear. Once aligned, drive nails or screws at regular intervals along the edges to attach it securely, reinforcing the structural integrity.
Next, add trim pieces around the edges of the plywood backing. These trim pieces should be cut to fit precisely, enhancing the overall appearance. Attach the trim pieces using nails or wood glue.
Step 7: Finish Touches.
For the finishing touches, meticulously sand down all rough edges. Apply wood filler to any gaps or holes for an impeccably smooth surface. Fill nail holes with wood filler, ensuring no imperfections remain. Use fine-grit sandpaper to achieve a polished finish. After sanding, remove any dust with a tack cloth. Consider adding stencils or wallpaper for a custom look.
Conclusion
You’ve now got the know-how to create a stunning dollhouse bookshelf. Following these detailed steps ensures your dollhouse bookshelf will be a cherished piece for years
Now, gather your materials and start crafting your perfect dollhouse bookshelf!
